
Why build arrows?
Ever since Liam started shooting and I got back into shooting, I wanted the ability to replace vanes and other components as necessary so I was not dependent upon a shop any more than I needed to be. That is mainly because there is not a local shop to Massena NY anymore.
I invested in a Bohning Triple Tower Fletching Jig, ordered some Vanetec vanes and Blazer vanes and some glue. I scraped the vanes off the current arrows, followed instructions online and learned to fletch arrows. The jig came with right helical which is what the arrows were previously, so that is what I put back on. I also had the option for right offset or straight, but matching was more important (I thought). We re-fletched Liam’s arrows with his colors (red and black) and redid my arrows with White and USA flag vanes.
I had no clue that what I was doing was almost completely wrong. I watched more videos and learned that most bows twist arrows to the left now (left helical) and that most off the rack arrows are right helical. That means that at some point in a longer shot, the arrows stops its rotation and starts to rotate the other way. Vaneless arrow shots helped to figure out which way an arrow turns out of our bows, and both of us needed a left helical vane setup.
I decided it was time to invest in a higher quality fletching jig. I settled on the October Mountain Products new Phoenix Fletching Jig. This allows me to run straight, left helical and right helical vanes with minimal adjustments once it is setup. It also allows the replacement of a single vane if you have an issue, rather than having to re-do all 3 unlike the previous jig.
Liam and I used this to refletch his arrows as we had to go to longer shafts as he has grown. Learning through the process and making adjustments as we went made this a good first process with the new jig.
So, now that we had the jig figured out, I started to think out my arrow build.
Building a new arrow
Logically, I wanted a lightweight arrow that would keep my arrow speed up on my 60lb bow (PSE Perform X 3D). I was previously shooting a 27″ Easton (Beman) Hunter Classic 6.5 in 400 spine. There was a desire to go lighter and try to gain some feet per second so I started looking into arrow shaft weights, specifically grains per inch (gpi). The Easton weighed in at 8.4 gpi, so I knew I wanted to be lighter. I also was considering going with a fatter arrow as something new to try. I was trying to find a fatter shaft that weighed less.
First, I looked into the Victory VTAC 23, Gold Tip Series 22, Altra Arrows 23 Centrum series and everything else in that range. I ended up settling on the VTAC 23 Gamer (just slightly less straight than the non gamer version). This came in at 6.8gpi in the 380 spine. Significantly lower than the 8.4 of the Easton and was slightly lower than the 7.3 gpi in the Gold Tip 22 Series.
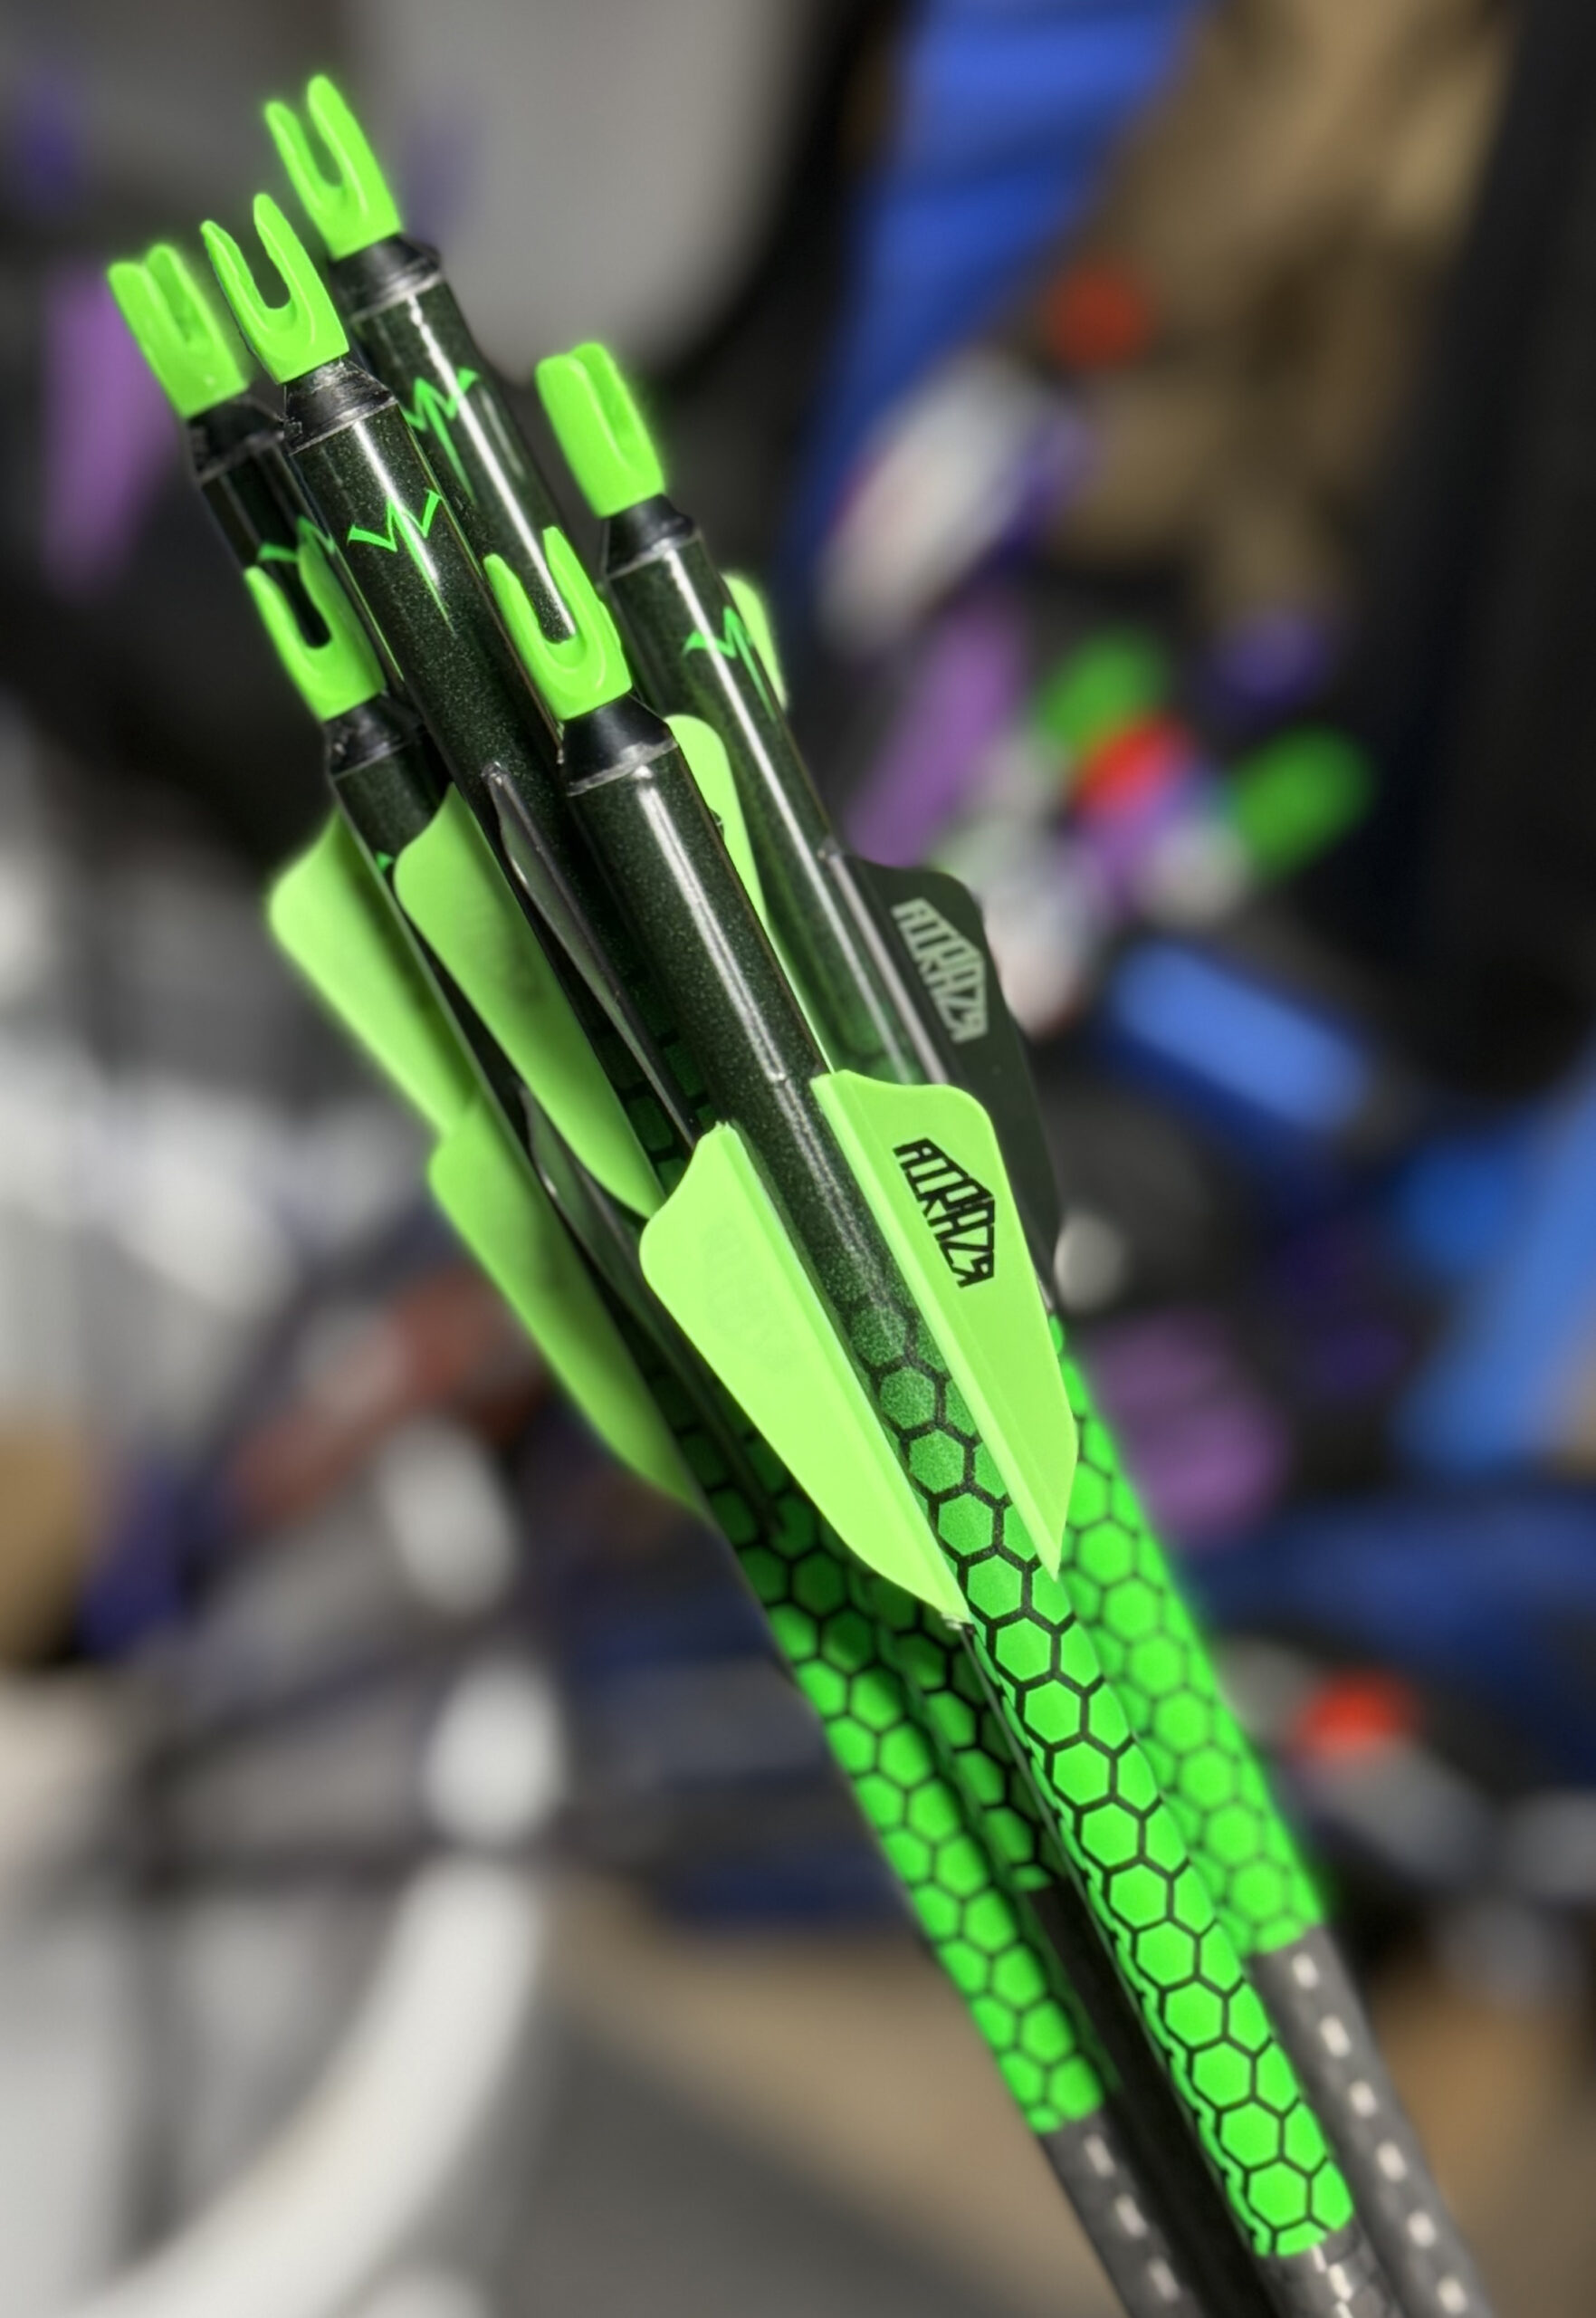
I wanted to try a 100 grain glue in point, in addition to a 16 grain nock bushing, 7 grain nock, 12 grains arrow wrap, and 15 grains in the vanes. This put my total arrow weight at just over 340 grains. That is 58 grains lighter than my previous arrow at 398 grains.
I built out the arrows using permanent glue for the point and hot glue for the nock bushing. I used Whitewater Archery arrow wraps (12 grains) and AAE AIRAZR vanes for a 3 fletch.
So far, I have only built out 6 of these arrows so far, and have really enjoyed them at 20 yards indoors. I am hoping to get them out to 40-60 yards here soon so I can get a new sight tape setup, but I am hopeful they will be awesome out of the bow.
I will follow up with more information about how they work at longer distances as soon as I can get them out that far.